Halloween is a magical time, transforming ordinary homes into haunted havens and everyday objects into fantastical props. And few characters capture that enchanting, spooky spirit quite like Jack Skellington, the Pumpkin King himself. If you've been dreaming of bringing his iconic, ghoulish grin to your seasonal decor, but dread the mess and fleeting nature of traditional carving, then diving into DIY Jack Skellington Foam Pumpkins & Craft Kits is your perfect ghoul-tide solution. This isn't just a craft; it's an opportunity to create lasting, mess-free magic that you can enjoy year after year.
Ready to immortalize the master of fright on a canvas that stands the test of time (and weather)? Let's get started.
At a Glance: Your Jack Skellington Foam Pumpkin Project
- Why Foam? Durable, reusable, safer than carving, and offers a perfect, smooth surface for painting Jack's intricate details.
- Skill Level: Beginner-friendly to advanced, depending on your chosen method (kit vs. from scratch).
- Time Commitment: Anywhere from 1-3 hours, plus drying time, for a basic design.
- Key Materials: Foam pumpkin, white and black acrylic paint, paintbrushes (detail brushes are a must!), pencil, sealant.
- Kits vs. DIY: Kits provide convenience and all-inclusive supplies; DIY offers ultimate creative freedom and budget control.
- The Big Payoff: A reusable, long-lasting, mess-free Jack Skellington pumpkin that perfectly captures the spirit of Halloween.
Why Foam Reigns Supreme for Jack's Iconic Grin
Forget the gooey mess, the sticky seeds, and the race against rot. While carving a fresh pumpkin has its nostalgic charm, when it comes to capturing the detailed, signature look of Jack Skellington, foam pumpkins are, quite frankly, a game-changer. They offer a canvas that real pumpkins simply can’t match in terms of precision, longevity, and sheer convenience.
As FunMoneyMom points out, painted pumpkins are a fantastic way to get creative for Halloween without the mess, making them a fun activity for kids of all ages. This sentiment perfectly encapsulates the appeal of foam pumpkins. Unlike their organic counterparts that begin to degrade the moment you carve them, foam pumpkins are designed for durability. They won't rot, wilt, or become a feast for local critters. This means your meticulously painted Pumpkin King can grace your porch, mantel, or desk not just for a week, but for many Halloweens to come.
The smooth, consistent surface of a foam pumpkin also provides an ideal foundation for paint. There are no bumps, divots, or unpredictable textures to contend with, allowing for cleaner lines and a more professional finish when tackling Jack's distinct eyes, nose, and that unforgettable, jagged smile. It’s the ultimate "no-carve" design solution, making it both budget-friendly and remarkably mess-free.
The "No-Carve" Revolution: Beyond the Guts and Glory
The traditional pumpkin carving ritual often involves sharp tools, slippery surfaces, and the inevitable scattering of pumpkin guts. While a cherished tradition for many, it's not without its drawbacks – especially if you're aiming for intricate designs or involving younger crafters. This is where the "no-carve" movement, spearheaded by painted pumpkins, truly shines.
Moving away from carving to a painted design unlocks a world of possibilities, offering precision that knives can't always achieve. It allows for detailed expressions, nuanced shading, and crisp lines, all without the risk of accidental cuts or the frustration of a pumpkin wall that's too thick or too thin. FunMoneyMom notes that Jack Skellington's spooky grin truly makes him stand out, a feature that’s much easier to perfect with a brush than a carving tool. This approach also significantly extends the life of your Halloween decor. Instead of a masterpiece that wilts and molds within days, you get a durable piece that can be packed away and brought out year after year, ready to spook again.
Moreover, the process of painting is inherently more accessible. It’s a fantastic family activity, allowing even the youngest members to contribute with safer tools and materials. From sketching the initial design to filling in the bold black features, each step can be tailored to different skill levels, making it a genuinely inclusive holiday craft.
Deconstructing Jack: Essential Materials for Your DIY Masterpiece
Before you embark on your journey to create the ultimate Pumpkin King, gathering the right supplies is crucial. Think of it like a mad scientist preparing their lab – precision matters!
Choosing Your Canvas: The Foam Pumpkin Itself
Foam pumpkins come in a delightful array of sizes, shapes, and finishes. When selecting yours, consider:
- Size: A larger pumpkin offers more surface area for detail and makes a bolder statement. Smaller ones are great for tabletop decor or if you're making multiple characters.
- Texture: Some foam pumpkins are perfectly smooth, ideal for crisp lines. Others might have a slightly textured, more realistic "pumpkin skin" feel. Choose based on your desired aesthetic.
- Color: Most foam pumpkins are orange, but you can also find white or cream-colored ones, which might require less base coat if you're aiming for a pristine white Jack.
- Pre-primed: Some higher-quality foam pumpkins come pre-primed, saving you a step. If not, a quick coat of white acrylic primer can make a huge difference in paint adherence and color vibrancy.
Painting Your Masterpiece: The Right Hues and Tools
Jack Skellington's iconic look is surprisingly simple in color palette, yet powerfully expressive.
- Paint Choices:
- Acrylic Craft Paint: This is your go-to. It's affordable, widely available, dries quickly, and offers excellent coverage. You'll primarily need crisp white (if your pumpkin isn't already white) and jet black. Opt for good quality craft acrylics for better pigment and smoother application.
- Spray Paint (Optional): For a very smooth, even base coat (especially white), spray paint can be incredibly efficient. However, ensure it's suitable for foam/plastic, as some harsh solvents can damage foam. Always test in an inconspicuous area first. If using spray paint, do so in a well-ventilated area and protect your surroundings.
- Paint Pens/Markers: Black paint pens with fine or medium tips can be fantastic for outlining details or adding small accents, especially if you struggle with fine brush control.
- Brushes & Applicators:
- Flat Brushes: For applying your base coats of white or light grey. Aim for a 1-inch to 2-inch flat brush depending on pumpkin size.
- Round Brushes: Useful for curves, especially around the eyes and jawline.
- Detail Brushes: Absolutely essential for Jack's eyes, nose, and signature jagged smile. You'll want a very fine-tipped brush, sometimes called a "liner" or "spotter" brush.
- Sponge Brushes (Optional): Can help create a smooth, even base coat with acrylic paint, minimizing brush strokes.
- Sketching Tools:
- Pencil: A regular graphite pencil (HB or 2B works well) is perfect for lightly sketching Jack's features onto the pumpkin before painting. It allows for easy corrections.
- Eraser: For those inevitable "oops" moments during sketching.
- The Finishing Touch:
- Clear Sealant/Finishing Spray: Once your paint is completely dry, a clear, matte or gloss sealant will protect your design from scuffs, moisture, and UV fading, ensuring your Jack lasts for many Halloweens. Again, choose one safe for foam.
Optional Embellishments for a Personal Touch
While Jack Skellington is perfect in his monochrome simplicity, you can always add a personal flair:
- Glitter: A subtle shimmer on the black features or around the eyes can add a magical touch.
- Fabric Scraps: A small piece of striped fabric or felt can be fashioned into his iconic bat bow tie and glued onto the stem area.
- LED Tea Lights: While foam pumpkins don't glow from within like carved ones, a small battery-operated LED tea light placed behind or beside your pumpkin can cast a spooky ambiance.
Craft Kits vs. Going Solo: Which Path to Pumpkin King?
Deciding whether to buy a pre-made DIY Jack Skellington foam pumpkin craft kit or source all your materials individually comes down to your priorities: convenience, creative control, and budget. Both options have their merits.
Embracing the Ease: DIY Jack Skellington Foam Pumpkin Craft Kits
Craft kits are the fast pass to Halloween decor. They typically come with everything you need: a foam pumpkin, pre-selected paints (usually white and black acrylic), brushes, and often a stencil or detailed instructions.
Pros of Kits:
- Convenience: All supplies are bundled together, saving you time and trips to multiple stores.
- Beginner-Friendly: Kits often include step-by-step guides, stencils, or even pre-printed outlines, making them ideal for novices or those looking for a quick, guaranteed success.
- Guaranteed Materials: You know you're getting materials that are compatible and in the right quantities.
- Gift-Ready: They make excellent gifts for fellow craft enthusiasts or kids.
Cons of Kits: - Less Creative Freedom: You're often limited to the kit's design, colors, and specific materials. If you have a unique vision for Jack, a kit might feel restrictive.
- Potentially Higher Cost: While convenient, the bundled price can sometimes be more expensive than sourcing individual items, especially if you already own some basic craft supplies.
- Quality Variability: The quality of included paints or brushes can vary between brands.
The Freedom of Creation: From-Scratch DIY
Going the "from scratch" route means you’re the master of your destiny, selecting every single component of your Jack Skellington pumpkin project.
Pros of From-Scratch DIY:
- Total Creative Control: You choose the exact pumpkin size, paint brands, brush types, and any embellishments, allowing you to bring your unique vision to life.
- Budget Flexibility: You can shop for deals, use supplies you already own, and prioritize where you spend your money.
- Customization: Want a metallic Jack? A distressed look? A tiny mini-Jack? Going solo allows for endless customization.
- Skill Building: The process of sourcing and experimenting with different materials can be a great way to hone your crafting skills.
Cons of From-Scratch DIY: - Time-Consuming: Requires more upfront planning, research, and trips to different stores (or extensive online shopping).
- Potential for Mistakes: Without a kit's guidance, you might pick incompatible materials or miss a crucial step, leading to frustration.
- Overwhelm: The sheer number of choices for paints, brushes, and sealants can be daunting for beginners.
Decision Criteria: Which Path is Right for You? - Budget: If cost is a primary concern and you have some supplies, DIY might be cheaper. If convenience is worth the extra cost, a kit is great.
- Time: Kits are faster. DIY requires more planning.
- Desired Customization: For a unique Jack, go DIY. For a classic, easy Jack, a kit works.
- Skill Level: Kits are excellent for beginners. Experienced crafters might prefer the DIY freedom.
Ultimately, both paths lead to a fantastic Jack Skellington foam pumpkin. Consider your personal crafting style and resources when making your choice.
Your Step-by-Step Guide to a Flawless Jack Skellington Pumpkin
Ready to bring the Pumpkin King to life? This detailed guide will walk you through each stage, ensuring your DIY Jack Skellington foam pumpkin stands out.
Step 1: Prep Your Pumpkin Canvas
A clean, prepped surface is the secret to a professional-looking finish.
- Clean It Up: Even new foam pumpkins can have dust or manufacturing residue. Wipe your pumpkin down thoroughly with a damp cloth and let it dry completely.
- Prime Time (If Needed): If your foam pumpkin isn't white or pre-primed, a coat of white or light grey acrylic primer (or white acrylic paint) is highly recommended. This helps subsequent layers of paint adhere better and ensures your white base for Jack is bright and opaque. Apply thin, even coats, allowing each to dry fully before applying the next.
Step 2: Laying Down the Base Coat
Jack Skellington is famously monochrome, typically appearing white or a pale grey against his black features.
- Choose Your Base: Most crafters opt for a stark white base. You can use white acrylic paint or, if priming, just build up your primer coats until opaque. Some prefer a very pale grey for a slightly more weathered, graveyard look.
- Apply Evenly: Using a flat brush or a sponge brush, apply thin, even coats of your chosen base color. Multiple thin coats are always better than one thick, streaky coat. Allow each layer to dry completely according to paint instructions (usually 15-30 minutes) before adding the next. This might take 2-4 coats for full coverage.
Step 3: Mastering Jack's Iconic Face: The Sketch
This is where Jack truly comes to life. Don't rush this step!
- Find Your Reference: Have a clear image of Jack Skellington's face handy. Pinterest (as referenced in our ground truth research) is an excellent source for "Diy jack skellington pumpkin" ideas, offering countless angles and styles. You can find everything from cartoonish to hyper-realistic interpretations.
- Lightly Sketch with Pencil: Using a regular pencil, lightly sketch Jack’s features onto your dry, white pumpkin. The key is lightly – you want to be able to erase and adjust.
- Eyes: Start with two large, almond-shaped eyes. Pay attention to the angle – Jack's eyes often have a slightly upward tilt towards the outer corners, giving him a mischievous or concerned look.
- Nose: Below the eyes, draw a small, inverted teardrop or coffin-shaped nose.
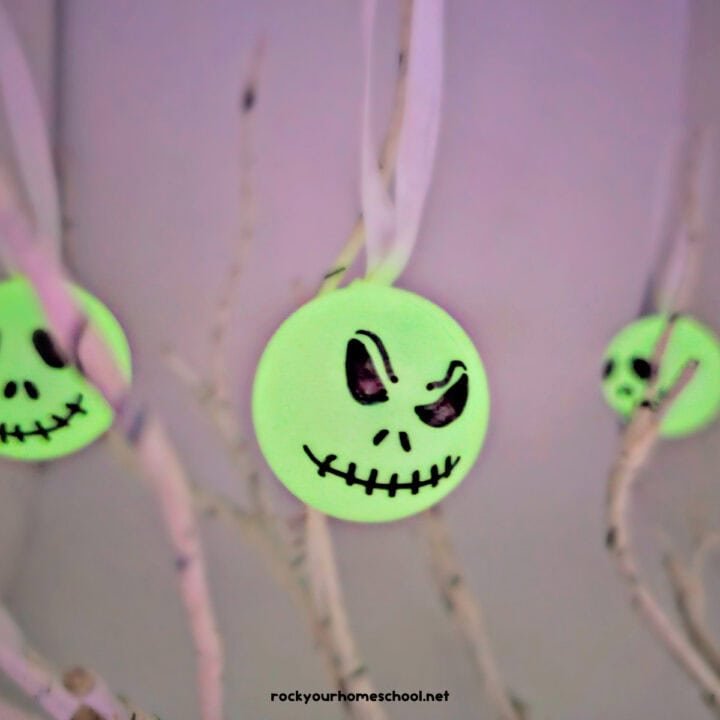
- Smile: This is his signature! Draw a wide, sweeping smile that extends almost from one side of the pumpkin to the other. Then, add the jagged, vertical lines that give his grin its distinct, stitched-up appearance. Aim for irregular, slightly angled lines rather than perfectly uniform ones.
- Refine and Adjust: Step back and look at your sketch from different angles. Does it look like Jack? Are the features balanced? Erase and redraw as needed until you're happy with the proportions. This pencil stage is your best friend for perfection!
Step 4: Painting the Details: Bringing Jack to Life
Now for the dramatic black details that define the Pumpkin King.
- Outline First: Using a fine detail brush and black acrylic paint, carefully outline all the pencil lines you sketched for the eyes, nose, and mouth. Take your time, breathing steady to keep your hand from shaking.
- Fill It In: Once the outlines are dry, use a slightly larger round brush or flat brush to fill in the outlined areas with black paint. Again, apply thin coats for an opaque, smooth finish. You might need two coats.
- Refine Edges: While the black paint is still wet (or after it dries, with white paint for touch-ups), use your detail brush to sharpen any edges or correct any wobbles. A small, stiff brush dipped in water can help clean up mistakes on the fly.
- The Jagged Smile: This requires patience. Ensure each vertical line of his smile is distinct and appropriately jagged. The slight imperfections are part of his charm!
Step 5: Adding Depth (Optional, but Recommended)
For an extra touch of realism or character, consider adding subtle depth.
- Shading: A very dilute grey wash (black paint mixed with a lot of water) can be applied sparingly around the edges of his features or under his chin to create subtle shadows, giving the pumpkin more dimension. Wipe off excess immediately.
- Highlights: A tiny dot of white in the corner of his eyes can simulate a slight glint, making them appear more lifelike.
Step 6: The Finishing Touch: Sealant and Curing
Protect your hard work!
- Ensure Dryness: Wait until all paint layers are completely dry – this can take several hours, or even overnight, especially for thicker paint applications. Rushing this step can lead to smudging or cloudy sealant.
- Apply Sealant: In a well-ventilated area, apply 1-2 thin, even coats of your chosen clear sealant (matte or gloss, depending on your preference). Hold the spray can about 8-10 inches away and use a sweeping motion. If using a brush-on sealant, apply carefully to avoid disturbing the paint.
- Cure Time: Allow the sealant to cure fully according to the product instructions. This might take 24-48 hours. Once cured, your Jack Skellington foam pumpkin is ready for display!
Beyond Jack: Expanding Your Nightmare Before Christmas Display
Why stop at just Jack? The world of The Nightmare Before Christmas is rich with memorable characters perfect for accompanying your Pumpkin King. As FunMoneyMom suggests, you can even make a Sally Pumpkin to keep Jack company!
- Sally Skellington: Her patchwork design and wistful expression translate beautifully to a painted foam pumpkin. You’ll need a wider array of acrylic colors for her dress and stitches.
- Oogie Boogie: His burlap texture and menacing grin can be recreated with paint and perhaps some clever use of textured medium or even actual burlap glued onto a foam pumpkin.
- Zero: Jack's faithful ghost dog can be painted on a smaller, white foam pumpkin, complete with his glowing pumpkin nose (perhaps a small LED light embedded in the foam).
- Scene Elements: Consider painting smaller foam pumpkins with iconic elements from Halloween Town – spiderwebs, gravestones, or even miniature versions of Lock, Shock, and Barrel’s faces.
- Creating a Vignette: Arrange your finished pumpkins with other themed decor like fake cobwebs, black tulle, raven figurines, or even a mini graveyard scene. The beauty of durable foam pumpkins is that they blend seamlessly into any display, indoors or out. For more ideas and inspiration across all kinds of Jack Skellington pumpkin projects, be sure to explore everything about Jack Skellington pumpkins.
Troubleshooting & Pro Tips for Pumpkin Perfection
Even seasoned crafters encounter bumps in the road. Here’s how to navigate common issues and elevate your Jack Skellington creation.
Common Pitfalls and How to Fix Them
- Streaky Base Coat: Usually caused by too-thick paint, not enough paint, or rushing drying time.
- Fix: Apply more thin coats, ensuring each dries completely. If it’s very streaky, gently sand down with fine-grit sandpaper (if the foam allows) and re-prime.
- Wobbly Lines/Smudges: A common issue, especially with detail work.
- Fix: If the paint is wet, gently wipe away with a damp cotton swab or a fine, damp brush. If dry, carefully paint over the mistake with your base white paint, let it dry, then redraw the black detail. Patience is key!
- Paint Not Adhering: Can happen if the pumpkin wasn't clean, if primer wasn't used on a slick surface, or if the wrong type of spray paint was used.
- Fix: Ensure surface is clean. Use an appropriate primer designed for foam/plastic. Always test spray paints on an inconspicuous area first.
- Uneven Jack Skellington Smile: His grin is distinctive, and getting it right can be tricky.
- Fix: Spend extra time on the pencil sketch. Use stencils or printable templates for guidance. Remember, a little asymmetry can add character!
Pro Tips for a Polished Project
- Work in Good Lighting: Natural light is best to see true colors and avoid shadows that obscure details.
- Use a Lazy Susan/Turntable: This allows you to rotate the pumpkin easily, ensuring even paint application and easy access to all sides without touching wet areas.
- Steady Your Hand: Rest your painting hand on the table or against your non-painting hand for stability, especially when working on fine details like Jack's eyes and mouth.
- Clean Brushes Immediately: Acrylic paint dries fast and is hard to remove once dry. Clean your brushes with soap and water right after use.
- Protect Your Workspace: Lay down newspapers, cardboard, or a craft mat to catch spills and protect your surfaces.
- Involve the Kids Safely: Painting foam pumpkins is a fantastic family activity! Let younger children help with base coats or use finger paints (water-based and washable) for simple patterns. Older kids can tackle sketching and filling in larger black areas. Always supervise closely.
Frequently Asked Questions About Foam Pumpkin Crafts
Got more questions about bringing the Pumpkin King to your home? Here are some common queries and their answers.
Q: Can I use real pumpkins for this kind of design?
A: Absolutely! The "no-carve" painting technique works perfectly on real pumpkins, as FunMoneyMom's tutorial clearly demonstrates. The main difference is longevity: a painted real pumpkin will eventually rot, while a foam pumpkin is reusable year after year.
Q: What kind of paint is truly best for foam pumpkins?
A: Acrylic craft paint is overwhelmingly the best choice. It’s water-based, non-toxic, dries quickly, offers good coverage, and adheres well to foam. Look for matte or satin finishes for a classic Jack look.
Q: How long does it typically take to complete a DIY Jack Skellington foam pumpkin?
A: For a basic design, expect to spend 1-3 hours on active painting and detailing. However, this doesn't include drying time between coats, which can add several more hours, or even overnight, depending on humidity and paint thickness. Plan accordingly!
Q: Are the DIY Jack Skellington foam pumpkin craft kits worth the investment?
A: For beginners, busy individuals, or those who prefer an all-inclusive, guided experience, kits are definitely worth it. They take the guesswork out of material sourcing and often provide helpful templates. If you're an experienced crafter seeking maximum customization or want to save money by using existing supplies, going the from-scratch DIY route might be more satisfying.
Q: Where can I find good stencils or templates for Jack Skellington's face?
A: A quick online search for "Jack Skellington face stencil printable" or "Diy jack skellington pumpkin template" will yield many results. Pinterest, as noted earlier, is a treasure trove of ideas and free printables. You can print these, cut them out, and lightly trace them onto your pumpkin.
Q: How do I store my foam pumpkin so it lasts for years?
A: Once completely dry and sealed, store your foam pumpkin in a cool, dry place away from direct sunlight and extreme temperatures. A sturdy box in a closet, attic, or garage (if temperature-controlled) is ideal. Wrap it in tissue paper or bubble wrap to protect the painted surface from scratches.
Bringing Your Spooky Vision to Life
Creating a DIY Jack Skellington foam pumpkin isn't just a craft project; it's an annual tradition waiting to happen. You're not just painting a foam sphere; you're bringing a piece of beloved Halloween cinema to life, one brushstroke at a time. The satisfaction of displaying your own hand-painted Pumpkin King, free from the mess and decay of traditional carving, is truly unmatched.
Whether you opt for the convenience of a kit or the creative freedom of sourcing your own materials, the process is rewarding, accessible, and ultimately, a fantastic way to celebrate the spooky season. So gather your supplies, put on The Nightmare Before Christmas soundtrack, and let your inner artist conjure the magic of Halloween Town. Your porch (or mantelpiece) will thank you for it.